
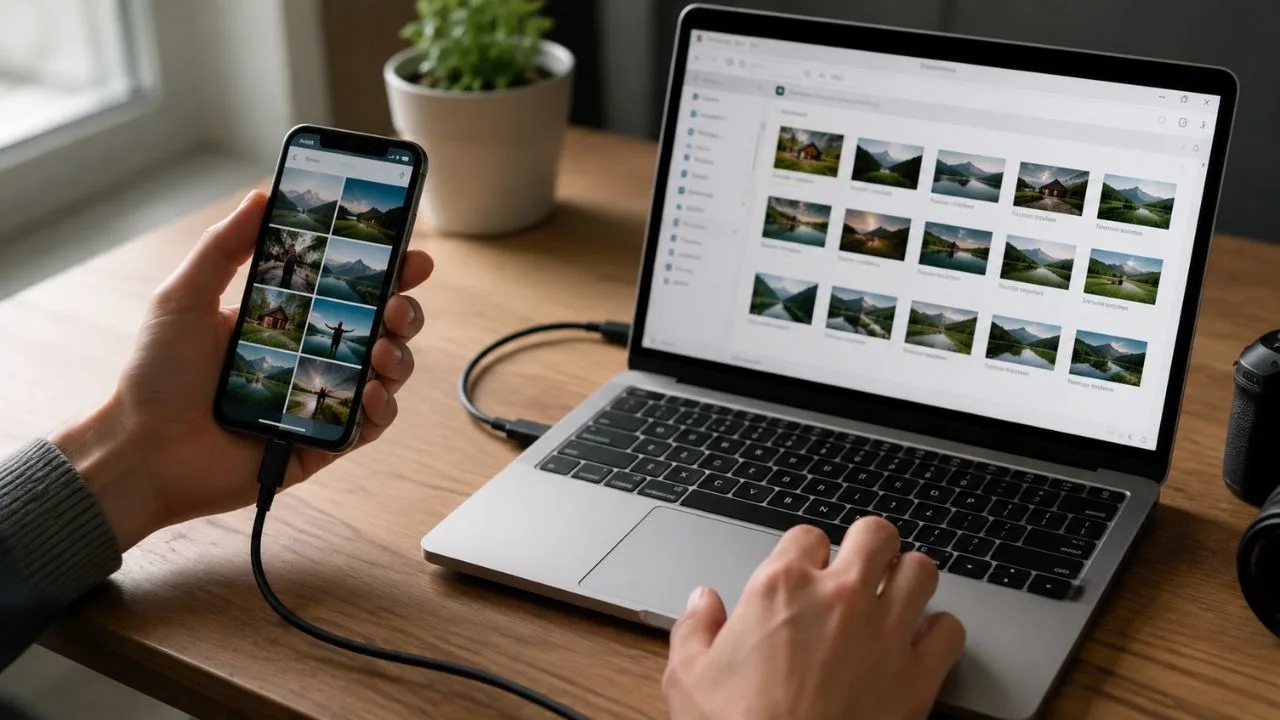

Photos can quickly fill your phone’s storage, especially when you regularly capture videos, screenshots, family moments, or work-related images. Moving them to a computer creates more space on your device and makes your collection easier to organise. It also gives you another copy if your phone is damaged, lost, or unexpectedly stops working.
The best transfer method depends on the devices you use and the number of pictures you need to move. A USB cable is usually suitable for transferring a large photo library, while AirDrop and Quick Share are convenient for wireless transfers. Cloud services such as iCloud Photos, Google Photos, and OneDrive can also make your pictures available across multiple devices.
You do not need advanced technical knowledge to copy images from a phone to a laptop or desktop computer. Most methods involve connecting a cable, approving access, selecting pictures, and choosing a destination folder. Even wireless options are generally easy once both devices are connected correctly and have the necessary sharing settings enabled.
This guide explains how to transfer photos from phone to computer using reliable wired and wireless methods. It covers Android phones, iPhones, Windows PCs, and Mac computers while also addressing common connection problems. By the end, you should be able to choose the fastest and most practical method for your devices.
What Is the Easiest Way to Transfer Photos?
For many people, connecting the phone to the computer with a compatible USB cable is the easiest option. It does not depend on internet speed, usually preserves the original image quality, and can handle hundreds of photos. You can import pictures through the computer’s Photos app or copy them manually from the phone’s storage.
Wireless transfer may be easier when you only need to send a small selection of pictures. AirDrop works between an iPhone and Mac, while Quick Share can move photos between many Android phones and Windows computers. These methods avoid cables, but both devices need compatible software, working wireless connections, and the correct visibility settings.
Cloud storage is often the most convenient choice for people who want automatic photo backup. Once camera uploads are enabled, pictures can appear on your computer through a website or desktop application. However, cloud transfers require internet access, sufficient account storage, and time for the original files to upload and download.
Email and messaging applications can work for one or two images, but they are not ideal for an entire camera roll. Some services reduce image quality, remove useful metadata, or limit attachment sizes. For a large collection, use a USB connection, photo-syncing service, or dedicated wireless file-transfer feature instead.
Prepare Your Phone and Computer Before Transferring
Begin by checking that the computer has enough available storage for the pictures and videos you plan to copy. High-resolution photos may use several megabytes each, while long 4K videos can be much larger. Create a dedicated destination folder before beginning so the imported files do not become mixed with unrelated downloads or documents.
Use a cable that supports data transfer rather than one designed only for charging. A phone may charge normally while remaining invisible to the computer if the cable cannot carry data. Whenever possible, use the original cable, a trusted replacement, and a direct computer port rather than an unreliable adapter or unpowered USB hub.
Unlock your phone before connecting it and keep the screen active during the first part of the transfer. Android devices may ask you to change the USB mode from charging to file transfer. An iPhone may display a message asking whether you trust or allow the connected computer to access its photos and videos.
It is also sensible to update your phone and computer before moving an important collection. Updates can resolve device-recognition problems and improve compatibility with current image formats. Close unnecessary applications, keep laptops connected to power during large transfers, and avoid disconnecting the cable until the computer confirms that the process is complete.
How to Transfer Photos from Android to Windows with USB
Connect your unlocked Android phone to the Windows computer using a data-capable USB cable. Swipe down from the top of the phone screen and tap the notification describing the USB connection. Select File Transfer, Transferring Files, or a similarly named option instead of leaving the connection set to charging only.
Open File Explorer on the computer and look for the phone under This PC. Select the device, open its internal storage, and find the folder containing your pictures. Camera images are commonly stored in the DCIM folder, although screenshots, downloads, messaging images, and edited pictures may be placed in separate folders.
Select the photos you want to move, right-click them, and choose Copy. Open the destination folder on the computer and choose Paste. Copying is safer than immediately moving the files because the originals remain on the phone until you have opened and checked the transferred versions on the computer.
You can also use the Microsoft Photos app instead of browsing folders manually. Open Photos, select the import option, choose the connected device, and select the items you want to save. This approach can be easier when you want Windows to find camera images automatically without searching through the phone’s folder structure.
How to Transfer Photos from iPhone to Windows
Install the current Apple Devices application from the Microsoft Store if it is required by your Windows setup. Connect the iPhone to the computer with a suitable USB or USB-C cable, unlock it, and approve any message asking you to trust or allow the computer. The phone must remain accessible while Windows detects its photo library.
Open the Microsoft Photos app and choose the option to import from a connected device. Allow the application to scan the iPhone, select the photos and videos you want, and choose where they should be saved. Avoid disconnecting the iPhone while Windows is still preparing, copying, or confirming the imported items.
You may also find iPhone images through File Explorer by opening the Apple device and locating its DCIM folders. This method can be useful when you prefer copying files to a specific folder. However, the folder names may not match the albums visible on the iPhone, making a large library more difficult to browse manually.
When iCloud Photos is enabled with storage optimisation, some full-resolution originals may be stored in iCloud rather than directly on the iPhone. Downloading the originals to the phone before a cable import may be necessary. Alternatively, install iCloud for Windows and access the synced images through File Explorer or Microsoft Photos.
How to Transfer Photos from iPhone to Mac
Connect the iPhone to the Mac using a compatible cable and approve any request to allow the accessory or trust the computer. Open the Photos app on the Mac and select the iPhone from the sidebar. The application should display an import screen containing the photos and videos currently available on the connected device.
Choose an existing album or create a new one for the imported pictures. Select particular items and click Import Selected, or choose the option to import all new photos. Wait until the transfer has completely finished before removing the cable, especially when copying a large number of high-resolution videos or Live Photos.
The Photos app is a good choice when you want your pictures stored inside a managed photo library. People who prefer regular files and folders can use Apple’s Image Capture application instead. Image Capture allows photos to be imported directly into a selected folder without placing them inside the main Photos library.
If iCloud Photos is enabled on both devices with the same Apple Account, the pictures may already appear automatically in the Mac’s Photos app. In that situation, a manual cable import may be unnecessary. Confirm that syncing is complete and that full-resolution versions are available before deleting anything from the iPhone.
How to Transfer Photos with AirDrop
AirDrop is one of the fastest ways to send a small or medium group of photos from an iPhone to a nearby Mac. Turn on Wi-Fi, Bluetooth, and AirDrop on both devices. Keep the phone and computer close together, and make sure the Mac is allowed to receive items from your contacts or other nearby users.
Open the Photos app on the iPhone and select the pictures you want to transfer. Tap the Share button, choose AirDrop, and select your Mac when it appears. When both devices use the same Apple Account, the transfer may be accepted automatically; otherwise, approve the incoming request on the Mac.
Depending on the Mac’s settings, received images may open in Photos or appear inside the Downloads folder. Check the files before removing them from your phone. AirDrop normally transfers the original item without the quality reduction that can happen when images are sent through certain social media or messaging applications.
AirDrop works best for nearby Apple devices and does not directly transfer photos to a Windows PC or most Android phones. Large libraries may take longer and can be less convenient to manage as a single wireless batch. For thousands of images, iCloud Photos or a direct cable import usually provides a more organised solution.
How to Transfer Android Photos with Quick Share
Quick Share provides a wireless way to move photos between a compatible Android phone and Windows computer. Install Quick Share for Windows if it is not already available, then open the application on both devices. Turn on Bluetooth and Wi-Fi, keep the devices nearby, and set the receiving computer to an appropriate visibility level.
On the Android phone, open the photo gallery or file manager and select the pictures you want to send. Tap the Share button, choose Quick Share, and select the computer from the list of nearby devices. Confirm that any displayed security code matches before accepting the transfer on the Windows computer.
The received photos are normally saved in a designated download or Quick Share folder, although the location may be adjustable in the application’s settings. Open several files to confirm that they transferred correctly. After verification, you can rename the folder and move the images into your main photo archive.
Quick Share is particularly useful when a cable is unavailable or when you only need to copy recent pictures. Transfer speed can vary with file size, wireless conditions, and device compatibility. For a very large camera library, a direct USB connection may still be faster, more predictable, and easier to resume if interrupted.
How to Use Google Photos on a Computer
Google Photos can make pictures from an Android phone or iPhone available through a web browser. Install or open the Google Photos mobile app, sign in to the correct Google Account, and enable backup for the folders you want to include. Leave the phone connected to a stable network while the images are uploaded.
On the computer, open Google Photos in a browser and sign in with the same account. Select an individual photo or video, open the additional options menu, and choose Download to create a local copy. You can select multiple items when you want to download a group of related pictures.
For an entire Google Photos collection, the account’s data-export service may be more practical than downloading items individually. A large export can be divided into several archives. Check the downloaded files carefully because folder structures, timestamps, edited copies, and metadata may appear differently after a complete library export.
Google Photos is useful when the phone and computer use different operating systems because it works through a browser. Its main limitations are internet speed and cloud storage space. Uploading thousands of original-quality pictures can take time, particularly when the phone has restricted background activity or an unstable connection.
How to Transfer Photos with iCloud Photos
On an iPhone, enable iCloud Photos through the Photos settings and allow enough time for the camera library to sync. The upload depends on available iCloud storage and internet connectivity. Keep the phone charging when uploading a large collection so power-saving settings are less likely to pause background activity.
On a Mac using the same Apple Account, synced pictures should appear in the Photos app. On a Windows computer, install iCloud for Windows, sign in, and enable iCloud Photos. You can then view the library through the iCloud Photos section of File Explorer or the connected Microsoft Photos application.
Cloud thumbnails may be visible before the original files have downloaded to the computer. Open or download the items you need and confirm that they are available locally before relying on them as a backup. A visible thumbnail does not always mean a full-resolution offline copy is stored on the computer.
Be careful when deleting pictures from an iCloud-synchronised folder. iCloud Photos is a syncing service, so changes made on one connected device can affect the library everywhere. Create a separate local backup or export folder before reorganising or permanently deleting important family, travel, business, or personal photographs.
How to Transfer Photos Using OneDrive
OneDrive can automatically upload photos from an Android phone or iPhone and display them on a Windows computer. Install the OneDrive mobile app, sign in to your Microsoft account, and enable Camera Upload in its settings. New camera pictures and videos should begin uploading when the phone has an appropriate network connection.
On the Windows computer, sign in to OneDrive and open its folder through File Explorer or connect the account to Microsoft Photos. Uploaded phone pictures should become available after syncing finishes. You can copy important files into a separate computer folder when you want an additional local version independent of the synced library.
Automatic upload is convenient because it reduces the need to remember regular manual transfers. However, it may also back up screenshots, saved social media images, and other unwanted pictures, depending on your settings. Review the uploaded camera roll occasionally so unnecessary files do not consume a large amount of cloud storage.
Remember that synchronisation and backup are not always the same thing. Deleting a synced item from the wrong folder may also remove its cloud copy. For valuable photos, keep another copy on an external drive or separate storage location so one accidental deletion, account problem, or damaged device does not affect every version.
How to Transfer Photos Without a USB Cable
AirDrop, Quick Share, and cloud storage are the most useful cable-free transfer options. AirDrop is designed for nearby Apple devices, while Quick Share supports many Android-to-Windows transfers. Cloud platforms are more universal because they allow pictures to be uploaded from a phone and downloaded through a browser on almost any modern computer.
You can also upload selected photos to Google Drive, OneDrive, iCloud Drive, or another trusted storage service. Once uploading is complete, open the same account on your computer and download the files. This is convenient for mixed-device households, although it involves both an upload and a download rather than a direct device-to-device copy.
Email can be practical for sending a few documents, receipts, or ordinary pictures to yourself. Attach the images on the phone, send the message, and download them from your computer. Attachment-size limits make this unsuitable for many photos, and some email or messaging workflows may resize images before they are delivered.
Before using a public or shared Wi-Fi connection, consider the sensitivity of the photos and the security of your account. Use reputable services, unique passwords, and multi-factor authentication where available. Avoid uploading private images through unfamiliar file-transfer websites simply because they promise a quick or free transfer.
How to Preserve Original Photo Quality
A direct cable transfer generally provides the best chance of copying the original file without compression. AirDrop and dedicated cloud-photo services can also preserve high-quality versions when their settings allow original uploads. Messaging and social media apps are more likely to reduce file size, resolution, or video quality to speed up sharing.
Check whether your phone is using formats such as HEIF, HEIC, HDR, or high-efficiency video. These formats can preserve quality while reducing storage use, but older software may not open them correctly. Updating the computer or installing compatible support is often better than converting every file and potentially creating unnecessary duplicates.
When compatibility is more important than storage efficiency, some phones allow future camera captures to use widely supported formats such as JPEG and H.264. Changing this setting does not automatically convert pictures already in the library. Existing files may still need to be exported, downloaded, or converted separately.
After transferring, compare the file dimensions and size with the original when quality is critical. Open full-screen versions instead of judging only by small thumbnails. Photographers and content creators should also check capture dates, location information, editing history, colour appearance, and other metadata before deleting the phone copies.
How to Organise Photos After the Transfer
Create a clear folder system before your photo collection becomes difficult to manage. One simple approach is to organise folders by year and month, such as 2026 > July, and then add event folders where helpful. Consistent folder names make it easier to search, sort, back up, and avoid importing the same pictures repeatedly.
Rename only the files that need descriptive names, because manually renaming thousands of photos can become time-consuming. A useful folder name may provide enough context without changing every image filename. Photo-management applications can also organise pictures by capture date, album, location, recognised subject, or manually added keyword.
Do not delete the phone’s originals immediately after the progress bar reaches the end. Open several photos and videos from different parts of the transferred collection. Confirm that the files are readable, complete, and stored in the intended location before using the phone’s storage-management tools to remove local copies.
For important memories, follow a multiple-copy approach rather than treating one computer as permanent protection. Keep the working photo library on the computer, maintain another copy on an external drive, and consider an additional encrypted cloud backup. Separate copies reduce the risk created by theft, accidental deletion, hardware failure, or ransomware.
Why Is My Phone Not Connecting to My Computer?
A charging-only cable is one of the most common reasons a computer cannot see a connected phone. Try another cable and a different USB port, preferably one directly built into the computer. Remove unnecessary adapters, restart both devices, unlock the phone, and reconnect it after the computer has completely restarted.
On Android, open the USB notification and select File Transfer rather than charging. If the message does not appear, disconnect and reconnect the cable while the phone remains unlocked. Some devices place USB preferences inside the connected-device settings, and manufacturers may use slightly different wording for the same data-transfer mode.
On an iPhone, watch for a prompt asking whether you trust or allow the computer. If the device remains undetected, reconnect it, approve the prompt, and confirm that Apple’s Windows software and device drivers are current. On a Mac, check whether the iPhone appears in Photos, Image Capture, or Finder.
Security software, damaged ports, low battery levels, pending updates, and temporary system errors can also interrupt transfers. Test the phone on another computer or test another device on the same port to narrow down the cause. When cloud transfer fails, check account storage, internet access, background permissions, and whether uploading has paused.
What to Do When Some Photos Are Missing
Missing photos may still be stored in the cloud rather than downloaded to the phone. This is common when storage optimisation is enabled. Open the phone’s photo application while connected to the internet and allow the original versions to download, or access the cloud library directly from the computer.
Pictures may also be spread across several folders. Android camera images usually appear in DCIM, while screenshots, downloads, messaging pictures, and edited files can be stored elsewhere. Search the phone by date or filename and check application-specific media folders before assuming that the transfer skipped the images.
Hidden, locked, recently deleted, archived, or shared-library items may not appear in an ordinary import screen. Review these areas inside the phone’s photo application. Some transfer tools also ignore items that were imported previously, so look for an option that displays all photos rather than only new ones.
When an import stops unexpectedly, transfer smaller groups instead of restarting the entire collection. Begin with a particular month or album and confirm each batch before continuing. Smaller transfers make it easier to identify a damaged file, unsupported video, disconnected cable, full destination drive, or specific item that is interrupting the process.
Which Photo Transfer Method Should You Choose?
Use a USB cable when you have hundreds or thousands of photos, limited internet access, or a need for full-resolution local copies. It is normally the most dependable option for a large one-time transfer. It also lets you control exactly which computer folder receives the pictures without relying on cloud storage.
Choose AirDrop when moving a manageable selection from an iPhone to a Mac. Choose Quick Share when transferring recent pictures from a compatible Android phone to a Windows computer. Both methods are convenient for nearby devices and are easier than connecting a cable when you only need a few files.
Choose iCloud Photos, Google Photos, or OneDrive when you want ongoing access and automatic uploads. These services are especially useful when the phone and computer are used regularly together. Review storage limits, synchronisation behaviour, image-quality settings, and deletion rules before trusting any cloud platform as your only photo archive.
Email or messaging should be reserved for a small number of non-sensitive pictures when convenience matters more than perfect organisation. Whichever method you choose, verify the copied files before deleting them from the phone. A transfer is only truly complete when the photos are readable and safely stored in more than one place.
Final Thoughts
Learning how to transfer photos from phone to computer helps protect important memories while freeing valuable storage on your mobile device. The process can be as simple as connecting a USB cable, approving access, and importing the selected pictures. Wireless and cloud-based methods provide additional flexibility when a cable is unavailable.
Android users can copy photos through File Explorer, Microsoft Photos, Quick Share, Google Photos, or OneDrive. iPhone users can use Microsoft Photos, Apple Devices, the Mac Photos app, Image Capture, AirDrop, or iCloud Photos. The best choice depends on your computer, available storage, internet connection, and photo-library size.
Always keep the phone unlocked during the initial connection and approve any access request that you recognise. Use a reliable data cable, wait for the transfer to finish, and inspect the copied files. These simple steps prevent many of the connection problems and missing-photo issues that users commonly experience.
Most importantly, do not treat moving photos as the same thing as safely backing them up. Keep at least one additional copy of valuable images on another drive or secure storage service. A well-organised backup can protect years of photographs even if your phone or computer is lost, damaged, or replaced.
How do I transfer photos from my phone to my computer with a USB cable?
Connect the unlocked phone using a data-capable cable and approve access. On Android, select File Transfer; on Windows or Mac, use File Explorer, Microsoft Photos, Apple Photos, or Image Capture to copy the pictures.
Can I transfer phone photos to a computer without the internet?
Yes. A USB cable transfers pictures directly without internet access. AirDrop and Quick Share can also work locally between compatible nearby devices, although their wireless features must be enabled.
Why does my phone charge but not transfer photos?
The cable may support charging without data, or the phone may be set to charging-only mode. Try another cable, unlock the phone, approve the computer, and select File Transfer on Android.
Does transferring photos reduce their quality?
USB transfers, AirDrop, Quick Share, and original-quality cloud downloads generally preserve image quality. Email, messaging, and social media services may compress photos or videos before sending them.
Is it safe to delete photos after transferring them?
Delete them only after opening several transferred files and confirming the full collection is complete. For important pictures, keep another copy on an external drive or secure cloud service before removing the phone originals.



