
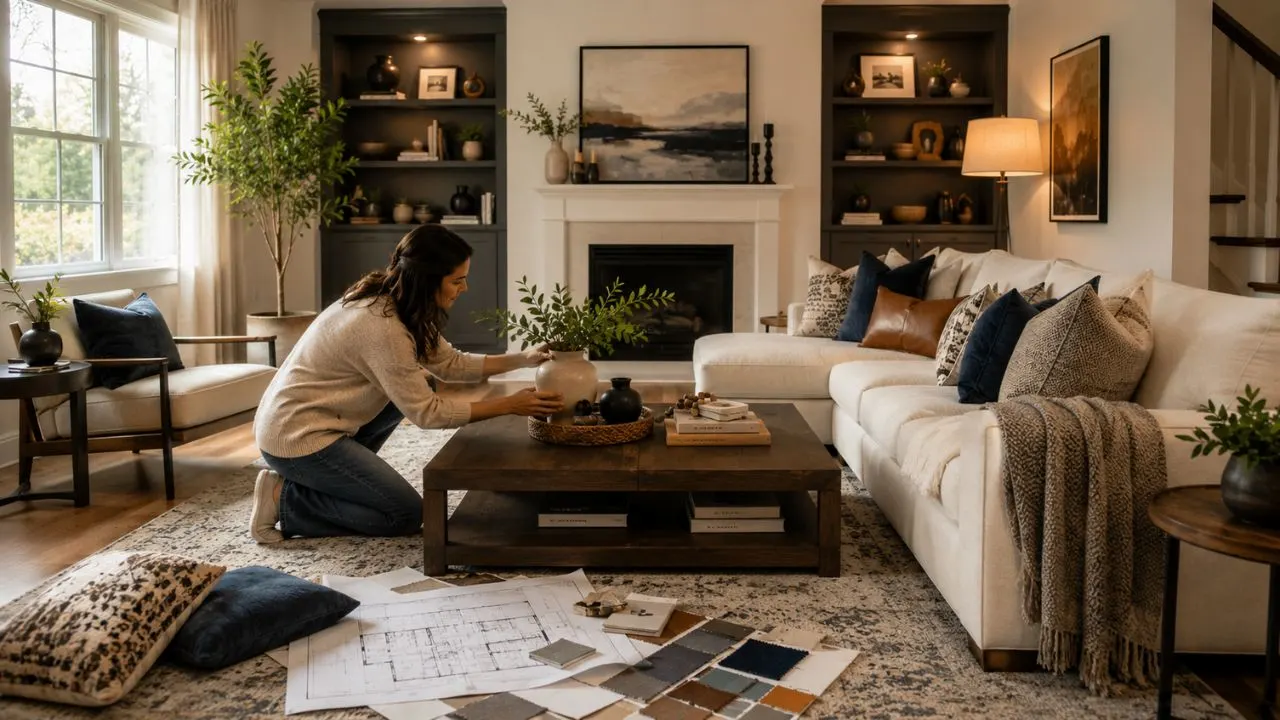

Decorating a living room can feel overwhelming because many decisions depend on one another. The sofa affects the furniture layout, the rug affects the colour palette, and the lighting changes how every material appears. Beginning with accessories may feel productive, but it often leads to mismatched purchases, wasted money, and a room that never looks completely finished.
A successful living room design starts with function before moving into furniture, colour, lighting, textiles, artwork, and decorative accessories. This order helps each choice support the next one. It also creates a comfortable room that reflects everyday life instead of producing a beautiful space that is difficult to use or maintain.
Current interiors are becoming warmer, more personal, and less rigidly formal. Designers are using richer colours, expressive patterns, vintage pieces, natural materials, and flexible furniture arrangements. Livability is increasingly treated as a form of luxury, with homeowners favouring rooms that support real activities rather than remaining untouched for special occasions.
This step-by-step guide explains how to decorate a living room from start to finish, whether you are furnishing an empty property or refreshing an existing space. You will learn how to plan the room, choose furniture, create a cohesive colour scheme, add layered lighting, control clutter, and complete the design without losing comfort or personality.
Step 1: Decide How the Living Room Must Function
Begin by listing everything that regularly happens in the living room. It may be used for watching television, reading, working, entertaining, children’s play, gaming, or quiet conversation. The room may also need to accommodate pets, overnight guests, mobility requirements, or storage for objects that do not fit elsewhere in the home.
Next, identify which activity should receive priority. A family that watches films together may need a large sofa, suitable screen position, and concealed media storage. Someone who entertains frequently may prefer several movable seats and conversation-friendly spacing. A reader may prioritise a supportive chair, side table, and well-positioned task light.
Consider how many people use the room every day and how many seats are required when guests visit. Permanent seating should meet regular needs, while stools, benches, ottomans, and dining chairs can provide occasional flexibility. This approach prevents the room from being permanently crowded simply to accommodate visitors who arrive only a few times each year.
Write a short design brief before shopping. Include the room’s main purpose, required seating, storage problems, preferred atmosphere, maintenance needs, and maximum budget. A clear brief helps you evaluate whether a product solves a real problem or merely looks attractive in a photograph.
Step 2: Declutter and Assess What You Already Own
Remove unnecessary objects before deciding what the room needs. Sort furniture, books, electronics, toys, cables, artwork, and decorative accessories into items to keep, repair, relocate, donate, or discard. Decorating around clutter makes it difficult to understand the room’s proportions and often encourages the purchase of storage that would not otherwise be necessary.
Examine the furniture you plan to keep. A well-made sofa may only need professional cleaning or new cushion covers, while an old wooden table could be repaired or refinished. Reusing suitable pieces can preserve character, reduce costs, and give you a practical starting point for the wider interior design plan.
Assess permanent features such as flooring, fireplaces, windows, doors, radiators, built-in cabinets, and electrical outlets. These elements affect the living room layout and colour palette even when they are not being replaced. Expensive or fixed finishes should normally influence new purchases rather than being ignored until the final stage.
Photograph the cleared room from every entrance and corner. Images make awkward proportions, blank walls, uneven furniture placement, and visual clutter easier to notice. They also provide a useful record when comparing paint samples, rugs, furniture, curtains, and artwork away from the room.
Step 3: Measure the Room and Create a Floor Plan
Measure the room before buying furniture. Record the length of each wall, ceiling height, window dimensions, doorway positions, fireplace width, radiator placement, and distances between architectural features. Also measure narrow entrances, corridors, staircases, and lifts through which large furniture must pass during delivery.
Create a simple floor plan on paper or with a room-planning application. Mark all fixed elements before adding scaled outlines for the sofa, chairs, tables, storage, and rug. A floor plan allows you to test several living room furniture layouts without repeatedly moving heavy objects or discovering expensive mistakes after delivery.
Plan clear circulation routes between entrances, seating, and adjoining rooms. People should be able to reach a chair or walk through the room without moving around sharp corners or squeezing between furniture. Design guidance consistently recommends considering circulation early and positioning the largest pieces before smaller tables and accessories.
Use masking tape to mark proposed furniture dimensions on the floor. This simple test reveals whether a sofa is too deep, a coffee table blocks movement, or an armchair occupies more space than expected. Leave the markings in place for a day and walk through the room as you normally would.
Step 4: Establish a Realistic Decorating Budget
Divide your total budget into categories before shopping. Include furniture, rugs, lighting, paint, curtains, storage, artwork, delivery, installation, electrical work, and a contingency amount. This prevents decorative accessories from consuming money that should have been reserved for essential seating or practical repairs.
Spend more on pieces that carry weight, receive daily use, or are difficult to replace. A supportive sofa, durable rug, comfortable chair, and suitable storage usually deserve a larger proportion of the budget. Trend-driven cushions, vases, throws, and small tables can be purchased affordably or updated later.
Remember that the listed purchase price may not represent the complete cost. Large furniture can involve delivery and assembly fees, while lighting may require an electrician. Curtains may need tracks, rods, lining, alterations, or professional installation, and second-hand furniture may require cleaning or repair.
Keep a spreadsheet or written list showing the estimated and actual cost of every item. Update the remaining budget after each purchase instead of relying on memory. A controlled budget makes it easier to wait for the right piece and reduces the temptation to complete the room through rushed, low-quality purchases.
Step 5: Choose a Clear Design Direction
Collect living room inspiration before deciding on a particular style. Save images that reflect the atmosphere you want, then examine them for repeated features. You may notice warm timber, curved furniture, pale walls, traditional rugs, dark colours, linen curtains, modern artwork, or a mixture of old and new pieces.
Do not feel required to select one strict label such as modern, traditional, farmhouse, or minimalist. Many inviting living rooms combine several influences. A contemporary sofa can sit beside a vintage table, while a traditional rug can soften clean architectural lines. Repeated colour, proportion, and material will create unity even when the furniture comes from different periods.
Current living room trends favour personal, layered interiors rather than perfectly matched showrooms. Rich brown, burgundy, olive, decorative trim, expressive fabrics, vintage references, and colour-drenched rooms are appearing alongside simpler natural materials. Use these trends selectively instead of forcing every fashionable detail into one space.
Describe the intended atmosphere using three words, such as “warm, relaxed, collected” or “bright, simple, natural.” Refer to those words when evaluating possible purchases. An item may be attractive on its own, but it should still support the emotional direction of the finished room.
Step 6: Build a Cohesive Living Room Colour Palette
Begin the colour scheme with the elements that are staying in the room. Flooring, a favourite rug, existing upholstery, artwork, or a stone fireplace can provide useful colour direction. It is generally easier to match paint to fabric and furniture than to find furniture that perfectly matches a paint selected in isolation.
Choose one dominant colour, one or two supporting tones, and several smaller accents. The dominant shade may cover the walls or appear on the largest furniture. Supporting colours can be repeated through curtains, chairs, and rugs, while accent tones appear in cushions, books, artwork, and decorative objects.
Warm neutrals such as cream, taupe, sand, mushroom, and soft brown create a flexible background, but neutral does not need to mean colourless. Forest green, rust, navy, terracotta, burgundy, ochre, and muted blue can add depth. Repeating each important shade at least twice makes the palette feel intentional.
Test large paint samples on different walls and observe them during daylight and evening. Paint changes according to window direction, bulb temperature, flooring, and surrounding colours. When painting or renovating, provide good ventilation and consider lower-emitting products because finishes and other household materials can release pollutants into indoor air.
Step 7: Identify and Strengthen the Focal Point
A focal point gives the eye a natural place to rest when entering the room. It may be a fireplace, large window, artwork, media wall, bookcase, architectural detail, or distinctive piece of furniture. Identifying it early helps organize the seating arrangement and prevents several competing features from creating visual confusion.
Arrange the main furniture so it acknowledges the focal point without making every seat face it rigidly. A television may be important, but it does not always need to dominate the entire design. Artwork, shelving, a textured wall, or a fireplace can share attention and create a more balanced visual experience.
When the room has no natural focal point, create one deliberately. Hang a large artwork, paint one wall in a deeper tone, install built-in shelving, or position an attractive console with a lamp and mirror. Houzz recommends identifying the strongest feature first and using furniture placement or decorative contrast to reinforce it.
Avoid creating too many equal focal points. A patterned feature wall, oversized artwork, dramatic fireplace, bright sofa, and large television may all compete. Choose one dominant element and allow the remaining features to support it through quieter colour, scale, and placement.
Step 8: Plan the Furniture Layout Before Buying
Place the sofa or largest seating piece first because it determines the scale of the remaining furniture. Position it according to the focal point, conversation area, window view, and circulation routes. Do not assume that every sofa must sit against the longest available wall.
Pulling furniture slightly away from the walls can create a more intimate seating arrangement and improve the room’s proportions. Recent designer guidance identifies pushing every piece against the perimeter as a common living room mistake. Furniture should relate to the people using it and the centre of the room, not only to the walls.
Place chairs close enough for comfortable conversation, then add side tables within easy reach. The coffee table should relate to the seating area without blocking movement. In a large room, create separate zones for reading, conversation, music, or games rather than stretching one arrangement across the entire floor.
Balance visual weight across the space. A heavy sectional on one side may need an armchair, cabinet, tall plant, or floor lamp on the opposite side. Balance does not require exact symmetry, but the completed living room should not appear crowded in one area and unfinished in another.
Step 9: Select the Main Furniture in the Right Order
Choose the sofa before smaller furniture unless you already own a rug, artwork, or statement chair that defines the design. Evaluate seat depth, height, cushion firmness, frame construction, upholstery durability, and cleaning requirements. Comfort should be tested in person whenever possible because product photographs cannot communicate support.
Add armchairs according to the room’s scale and everyday needs. Matching chairs create formality and symmetry, while different but coordinated chairs produce a more collected appearance. Swivel chairs can be useful in open-plan spaces because they allow users to turn between the television, conversation area, and adjoining room.
Choose coffee and side tables after establishing the seating arrangement. Their height should relate comfortably to sofa and chair arms, while their shape should improve movement. Round or oval tables reduce sharp corners in compact rooms, whereas rectangular tables often complement long sofas and larger seating groups.
Avoid buying a complete matching furniture set simply because it is convenient. Rooms generally feel more personal when materials and silhouettes coordinate without being identical. Mix timber, upholstery, stone, metal, glass, or painted finishes while repeating selected details to maintain cohesion.
Step 10: Anchor the Room With the Correct Rug
An area rug defines the living room seating zone and connects individual furniture pieces. It can introduce colour, texture, pattern, and softness while improving acoustics and comfort. A rug that is too small often makes the furniture appear disconnected and visually reduces the scale of the room.
As a practical starting point, choose a rug wide enough to extend beyond the sofa and accommodate at least the front legs of the main seating pieces. Designers commonly recommend using the rug to pull the whole arrangement together rather than leaving it as a small island beneath the coffee table.
Match the material to the household. Low-pile and tightly woven rugs are easier to move chairs across and may be simpler to clean. Softer wool or deeper-pile rugs provide warmth but require more maintenance, while washable options can be valuable in homes with young children or pets.
Use pattern according to the rest of the room. A detailed rug can energize plain furniture, while a simple textured rug allows patterned upholstery or artwork to remain dominant. Always bring home a sample when possible because colours and scale can appear very different from online photographs.
Step 11: Create a Layered Lighting Plan
Living room lighting should support different activities and times of day. One ceiling fixture rarely provides comfortable illumination for reading, entertaining, watching television, and relaxing. A flexible scheme combines ambient, task, and accent lighting placed at different heights around the room.
Ambient lighting provides general visibility through pendants, flush fixtures, chandeliers, recessed lights, or indirect illumination. Task lighting includes floor lamps beside reading chairs and table lamps near sofas. Accent lighting highlights artwork, shelving, architectural features, or decorative objects and adds visual depth.
Recent design guidance recommends using several light sources at different heights rather than relying entirely on ceiling lights. Table lamps bring light closer to the human scale, while floor lamps and sconces help distribute a welcoming glow across the room.
Install dimmers where possible and select LED bulbs with a consistent colour temperature. LEDs can provide high-quality light with strong energy efficiency, but brightness, colour rendering, fixture design, and positioning still affect the final result. Choose lighting according to the task rather than judging bulbs by energy consumption alone.
Step 12: Add Window Treatments for Softness and Control
Window treatments influence privacy, daylight, insulation, acoustics, and the room’s apparent height. They also introduce a large area of colour and texture, so they should be selected as part of the overall living room colour palette rather than treated as an afterthought.
Hang curtains high enough to emphasize the wall’s vertical dimension and allow them to reach the floor. Panels that stop awkwardly above the flooring can make windows appear smaller. Extending the rod beyond the window frame allows curtains to sit outside more of the glass when open, preserving natural light.
Choose fabric according to the required function. Lightweight curtains soften daylight and create movement, while lined fabrics provide greater privacy and visual weight. Blinds, shutters, or shades may offer better control, and layering them with curtains can combine practical adjustment with a softer finished appearance.
Consider how the treatment looks from both inside and outside the room. Curtains should open without blocking radiators, furniture, or frequently used doors. In a small living room, simple panels or Roman shades may control light without adding unnecessary volume around the window.
Step 13: Plan Storage and the Media Area
Identify what must be stored before selecting cabinets or shelves. Common living room clutter includes remote controls, gaming equipment, cables, toys, blankets, paperwork, and charging devices. Storage should give frequently used objects a convenient location rather than hiding them in a cabinet that nobody wants to open.
Combine closed and open storage. Closed cabinets create a calmer appearance by concealing practical objects, while shelves provide space for books, artwork, plants, and meaningful collections. Leaving some open space around displayed items prevents the shelves from appearing crowded and makes important pieces easier to notice.
Plan the television and media equipment carefully. Confirm comfortable viewing angles, screen height, socket positions, ventilation, and cable routes before fixing anything to the wall. A media console, painted wall, cabinetry, or nearby artwork can help integrate the screen instead of leaving it as an isolated black rectangle.
Use vertical space when the room is small. Tall cabinets, built-in shelving, wall-mounted lighting, and artwork draw attention upward while preserving floor area. Designers increasingly recommend using underused wall height to add storage and visual volume in compact rooms.
Step 14: Add Artwork and Personal Meaning
Artwork makes a living room feel connected to the people who live there. Choose pieces that create an emotional response, recall a place, support the colour palette, or represent personal interests. Generic wall decor may fill empty space, but meaningful art gives the room a stronger identity.
Scale artwork according to the furniture beneath it. One large piece can anchor a sofa or console, while several smaller works can form a gallery wall. Before making holes, arrange the composition on the floor or tape paper templates to the wall to test spacing and overall dimensions.
A gallery wall can combine paintings, prints, photographs, textiles, and small objects, but it needs a connecting idea. Similar frames, repeated colours, consistent spacing, or a shared subject will create order. Keep the composition within a clear overall boundary so it reads as one feature.
Include personal items beyond formal artwork. Family photographs, travel objects, ceramics, inherited pieces, and books can make a polished room feel lived in. Current interior design is moving toward character, memory, and emotional connection rather than perfectly anonymous decoration.
Step 15: Layer Textiles, Texture, and Natural Materials
Texture gives depth to a living room, particularly when the colour scheme is restrained. Combine materials that reflect light differently, such as linen, velvet, wool, leather, timber, glass, stone, metal, ceramic, and woven fibres. The contrast between smooth, rough, soft, matte, and glossy surfaces makes the room visually richer.
Add cushions according to the sofa’s size rather than covering every available seat. Mix sizes and textures while repeating colours from the rug, artwork, or curtains. Cushions should coordinate with the rug instead of matching it exactly, allowing the room to feel connected without appearing overly manufactured.
Throws add warmth and can introduce a seasonal colour or texture. Fold one loosely over an arm or place it in a nearby basket instead of arranging several identical blankets across the sofa. Curtains, lampshades, upholstery, and rugs should provide the main textile layers before small accessories are added.
Bring in wood, stone, clay, rattan, plants, or other natural elements to soften electronic screens and hard furniture. Choose plants according to actual light and maintenance conditions. One healthy plant in an appropriate location is more attractive than several struggling plants purchased only to fill empty corners.
Step 16: Style Tables and Shelves Without Creating Clutter
Begin surface styling with fewer objects than you think you need. A coffee table may require only a tray, a small stack of books, and one decorative item. A side table should still leave room for a drink, phone, or reading glasses instead of functioning entirely as a display platform.
Group objects in varied heights and shapes. A lamp, framed photograph, and low bowl create more interest than three items of identical size. Trays can organize small objects, while books provide height and help connect decorative pieces with the interests of the household.
Edit shelves so that some background remains visible. Combine horizontal and vertical books, then add a limited number of framed pictures, ceramics, or plants. Avoid placing one small ornament in the centre of every shelf because repeated arrangements can look stiff and predictable.
Step back and examine the entire room rather than styling each surface independently. Several beautifully arranged tables can still produce overall clutter when viewed together. Remove pieces that repeat the same colour, function, or shape without adding meaning, then store extras for future seasonal changes.
How to Decorate a Small Living Room from Start to Finish
A small living room requires careful scale, but that does not mean every piece should be miniature. One comfortable, appropriately proportioned sofa may use space more effectively than several small chairs. Furniture with exposed legs, open bases, or visually light materials can preserve a sense of floor area.
Prioritize multifunctional furniture. A storage ottoman can serve as a coffee table, footrest, extra seat, and blanket container. Nesting tables provide additional surfaces when needed, while a wall-mounted desk or console can support occasional work without permanently occupying the centre of the room.
Use vertical storage and maintain clear pathways. Tall shelving, wall lamps, mirrors, and higher curtain placement draw the eye upward. Limit deep furniture near doorways and avoid filling every wall simply because floor space is limited. A small amount of breathing room makes the design easier to understand.
Choose a focused palette and repeat it consistently. Small rooms can handle deep colour, pattern, and personality, but too many unrelated finishes may create visual confusion. One strong artwork, patterned rug, or colourful chair can provide impact while the remaining elements support it more quietly.
How to Decorate a Living Room on a Budget
Begin by rearranging the furniture you already own. Moving a sofa, changing the focal point, creating a tighter conversation area, or relocating a lamp can improve the room without any purchase. A better layout often creates more value than several inexpensive decorative objects.
Refresh existing pieces through cleaning and repair. Wash curtains, remove upholstery pilling, polish timber, replace damaged handles, conceal cables, and repaint a cabinet. A slipcover, new cushion inserts, or refinished table may extend the life of furniture that remains structurally sound.
Shop second-hand for solid timber furniture, mirrors, artwork, lamps, and decorative objects. Inspect upholstered pieces carefully, but do not reject minor scratches or dated hardware that can be repaired. Mixing vintage and new items can create a more individual room than purchasing everything from one collection.
Complete the room gradually. Buy the sofa, rug, lighting, and storage before filling shelves or changing every accessory. Leaving a wall temporarily empty is better than purchasing unsuitable artwork simply to declare the room finished. A thoughtful living room develops through editing as well as acquisition.
Common Living Room Decorating Mistakes to Avoid
Do not purchase large furniture without measuring both the room and delivery route. A sofa may technically fit against a wall but still overwhelm the floor plan, block a doorway, or leave insufficient space for tables. Masking-tape outlines and scaled plans help reveal these problems before money is spent.
Avoid using one ceiling light as the room’s entire lighting scheme. Harsh overhead illumination can flatten colours and leave seating areas uncomfortable. Table lamps, floor lamps, dimmers, and accent lights make the space more adaptable and improve its appearance during evening hours.
Do not choose a rug that is too small or push every furniture piece against the walls. Both choices can make the seating arrangement feel disconnected. Recent designer guidance repeatedly identifies undersized rugs, perimeter furniture layouts, and rooms that are too formal to use comfortably as common problems.
Finally, avoid following every current trend. A room containing colour drenching, floral upholstery, curved furniture, glossy finishes, fringe, and several vintage patterns may feel confused rather than fresh. Select trends that support your design brief, architecture, maintenance needs, and genuine taste.
Give the Finished Living Room a Final Edit
When the room appears complete, remove several accessories and reassess it after a day. The eye adapts quickly to clutter, so a short break can reveal surfaces that feel crowded or areas that remain visually empty. Photographing the room can also make imbalance easier to identify.
Test the room through normal use. Sit in every chair, walk through each entrance, watch the television, read under the lamps, and open cabinets and curtains. A finished design should work physically as well as visually. Move or remove anything that repeatedly interrupts comfort or movement.
Check whether important colours, materials, and shapes are repeated across the room. The rug might connect with artwork, timber may appear in several locations, and a curved chair may relate to an oval table. Repetition creates cohesion, but exact matching is unnecessary and can make the design feel overly controlled.
Allow the room to evolve. Books, photographs, seasonal flowers, travel objects, and future artwork may gradually enter the space. A successful living room should feel complete enough to enjoy now while remaining flexible enough to reflect changing routines and experiences.
Conclusion
Learning how to decorate a living room from start to finish begins with planning rather than shopping. Define how the space will be used, measure it carefully, establish a budget, and identify a design direction. These decisions create a reliable foundation for every furniture and decorating choice that follows.
Choose the focal point and furniture layout before purchasing the sofa, chairs, tables, or rug. Then develop a cohesive colour palette, plan layered lighting, and add practical window treatments and storage. This sequence prevents major pieces from competing and makes the final room easier to use.
Artwork, textiles, plants, books, and meaningful objects should add personality after the functional elements are working. These layers turn a correctly furnished room into a comfortable home. They should support the overall design without covering every wall, shelf, table, and seat.
The finished living room does not need to follow one style or current trend perfectly. It should feel comfortable, useful, balanced, and personal. When each decision supports both real life and visual harmony, the room becomes a space that people genuinely want to use rather than simply admire.
Frequently Asked Questions
What should I choose first when decorating a living room?
Begin with the room’s function, measurements, furniture layout, and budget. Choose the sofa or another important anchor piece before selecting paint, rugs, lighting, and small accessories.
In what order should I decorate my living room?
Plan the layout first, then select the colour palette, main furniture, rug, lighting, curtains, storage, artwork, textiles, and decorative accessories. Complete each functional layer before styling the smaller details.
How can I make my living room look professionally designed?
Use correctly scaled furniture, a large enough rug, layered lighting, repeated colours, and varied textures. Edit accessories carefully and ensure every piece supports the same overall atmosphere.
Should the sofa or rug be purchased first?
Purchase the sofa first when it is the largest investment and defines the room’s scale. Start with the rug when you already own a distinctive one that will determine the colour palette.
How long does it take to decorate a living room?
A simple refresh may take several days, while furnishing an empty room can take weeks or months. Completing the space gradually often leads to better decisions than purchasing everything during one shopping trip.